So you’re putting a new range hood in your kitchen, but not sure how to do it?
You’ve come to the right place. In this guide, we’ll look at the step-by-step process for how to install a range hood under a cabinet.
Before You Begin
There are two different types of under-cabinet range hoods: ducted and ductless.
Steps for installation will vary depending on the type of range hood you’re installing. Ductless range hoods are generally easier, as range hood duct installation can add several extra steps to the overall process. That said, if you’re installing a new range hood in the place of a previous ducted range hood, the ductwork may already be in place.
Regardless of the type of range hood you choose, it’s important to follow the installation instructions for that specific product. This guide will give you basic knowledge of how to install an under-cabinet range hood, but it cannot account for all the various styles and specifications.
Tools You’ll Need
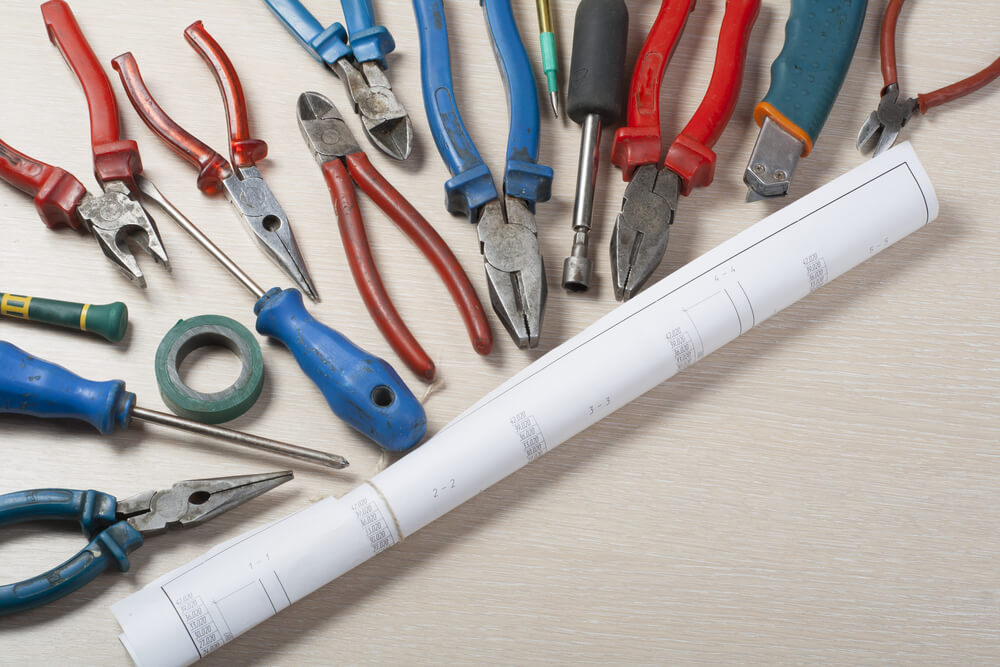
You’ll likely have most of these already:
- Non-contact circuit tester
- Level
- Power drill with screw tip
- Drill bits
- Wire nuts
- Wire stripper
- Screwdriver
- Duct tape
Gather all your tools before you start to make the work easier.
How to Install Range Hood Under The Cabinet
Step 1: Turn off Power Supply
Turn off the circuit breaker for the area you’ll be working on and make sure it stays off throughout the installation. You will be working with wires and circuits, so you need to ensure your safety by cutting the power supply. Test the wires with your circuit tester before starting to work.
The next four steps only apply to ducted range hoods. If you’re installing a ductless range hood, skip to Step 6.
Step 2: Remove Old Range Hood
If you are replacing an existing range hood, you’ll first need to remove the old one. Unscrew the wire nuts to disconnect the wires. Have someone stabilize the range as you loosen the screws holding it in place. Remove the screws, then lift out the old range hood.
Step 3: Check Existing Ductwork
If you’re connecting a ducted range hood to already existing ductwork, make sure the new range hood is compatible with the ductwork that’s already in place. Most under-cabinet range hoods use ductwork that travels upward, through the cabinets, before leading outside, but some will travel directly back through the wall. Know what kind of ductwork you have ahead of time and make sure your new range hood will be able to connect to it.
Step 4: Drill a Vent Hole
If you’re installing a new ducted range hood from scratch, you’ll need to cut a hole in the wall (and possibly the cabinets) for the ductwork to pass through. Exactly where and how you cut the hole will depend on the specific range hood you’re installing. The new hood should come with instructions and possibly a template for determining your hole placement.
Use a level to determine the center of the wall space, and mark this point with a pencil. Place the template over this spot and begin drilling the cutout area. At this point, you can also drill the places for the electrical wiring, unless you plan to hire an electrician to handle all the wiring.
Once you’ve finished drilling or cutting out your vent hole, check for pipes or studs in the space behind the drywall. Any obstacles in this space will have to be rerouted, and, depending on your skill level and confidence, you may want to hire a general contractor to handle that part of the installation.
After all the obstacles have been accounted for, install the ductwork in the most efficient and direct way that leads outside. Seal off joints with duct tape.
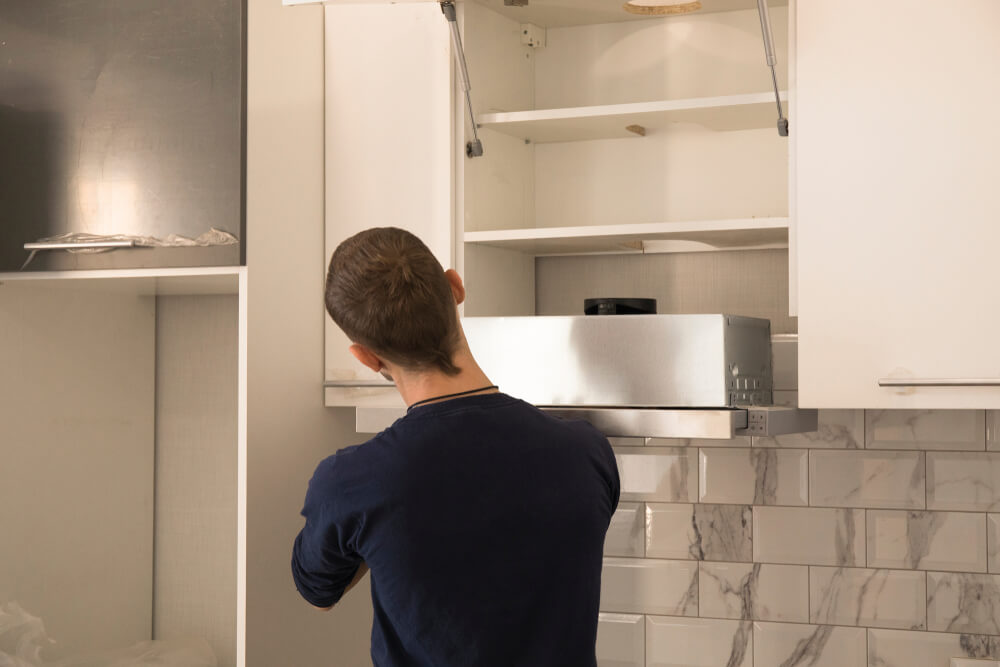
Step 5: Mount Range Hood to Wall
At this point, you’re ready to install the hood. Most hoods will come with a template for this as well. Mark the spots for the mounting screws according to the template.
If you’re mounting onto a tiled wall, you may want to create some small holes before drilling to avoid damaging the tile.
If you’re mounting to the cabinets, make sure they are sturdy enough to keep the screws from pulling out once you have the range hood in place. If the cabinets are thin, you may want to add some reinforcing blocks to drill your screws into.
Use the proper size drill bit to drill holes for the screws. Then replace the drill bit with the screw tip and drill the screws in.
Once the screws are in place, check the alignment with the vent hole. Realign as necessary.
Set the hood in place and connect the wires. There will be wires to power the hood’s fan and light plus a grounding wire in the wall that connects to the hood’s grounding screw. Connecting the wires is simple enough: connect the black wires from the hood to the black wires in the wall, and repeat the process with the white wires. However, if you’re uncertain about doing electrical work, you can hire an electrician for this part.
Step 6 (For Ductless Hood): Find Center of the Wall
Using a ductless hood will make under-cabinet range hood installation much easier. If you’re installing a ductless range hood, use a level to find the center of the wall space and mark it with a pencil. Use the provided template to mark the screw holes. If no template was provided, have someone hold the range hood in place while you mark the holes, then set it aside.
Step 7: Mount The Range Hood
Use an appropriately-sized drill bit to drill holes for the screws and wires. As with ducted range hoods, add reinforcing blocks for the screws if you’re mounting to thin cabinets, and take care not to damage tiles if you’re mounting to a tiled wall.
Set the range hood in place with the mounting screws and feed the wiring into the hood’s back. Connect the wires to the hood’s wiring using wire nuts, matching them up by color, and attach the wall’s grounding wire to the hood’s grounding screw. If you’re uncomfortable with electrical work, have an electrician do this part.
Conclusion
And there you have it! Remember to follow the specific instructions that come with the range hood, and you should be good to go. Enjoy your new range hood, securely installed under your kitchen cabinets.